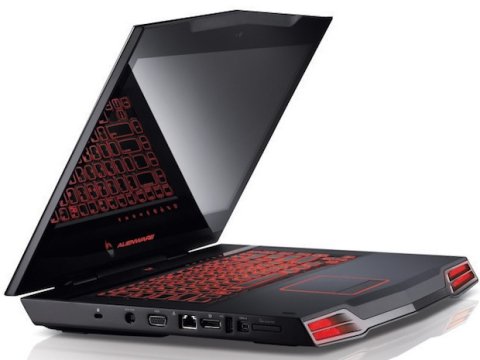
Hardware information reported by
lsusb command
Bus 001 Device 001: ID 0000:0000
Bus 001 Device 004: ID 0c45:6412 Microdia
Bus 001 Device 002: ID 8087:0020
Bus 002 Device 002: ID 8087:0020
Bus 002 Device 006: ID 413c:8158 Dell Computer Corp. Integrated
Touchpad / Trackstick
Bus 002 Device 001: ID 0000:0000
Bus 002 Device 004: ID 0a5c:4500 Broadcom Corp. BCM2046B1 USB 2.0 Hub
(part of BCM2046 Bluetooth)
Bus 002 Device 005: ID 413c:8157 Dell Computer Corp. Integrated Keyboard
Bus 002 Device 003: ID 187c:0512
|
Wireless notes
You only need download and install the firmware
iwl3945-firmware in
RPM-file,
after reload the
iwlagn
driver/module
To verify the sucessfull loaded driver, execute "
dmesg | grep iwl"
and you get the next result
iwlagn: Intel(R) Wireless WiFi Link AGN driver
for Linux, 1.3.27ks
iwlagn: Copyright(c) 2003-2008 Intel Corporation
iwlagn: Detected Intel Wireless WiFi Link 5300AGN REV=0x24
iwlagn: Tunable channels: 13 802.11bg, 24 802.11a channels
phy0: Selected rate control algorithm 'iwl-agn-rs'
Registered led device: iwl-phy0:radio
Registered led device: iwl-phy0:assoc
Registered led device: iwl-phy0:RX
Registered led device: iwl-phy0:TX
|
Video
The Video driver (in CentOS distribution) work without problems, but if
you like a 3D efects, run video some fast, or you like to use LCD panel
and external
monitor simultaneous, you need
download the
nVidia driver for Linux. Note: You need install the
kernel-devel
package.
To install the nVidia driver you need boot the laptop without X-Windows
enviroment, and execute
NVIDIA-Linux-x86_64-190.53-pkg2.run.
If you like to modify the X-configuration fie by handle read
this
file. I change the
/etc/X11/xorg.conf file, I put
only the add/modified sections.
Section "ServerLayout"
Identifier "Layout0"
Screen 0
"Screen0" 0 0
Screen 1
"Screen1" RightOf "Screen0"
InputDevice "Keyboard0"
"CoreKeyboard"
InputDevice "Synaptics"
"CorePointer"
EndSection
Section "Files"
RgbPath
"/usr/lib/X11/rgb"
FontPath
"unix/:7100"
EndSection
Section "Module"
Load "dbe"
Load
"extmod"
Load "type1"
Load
"freetype"
Load "glx"
EndSection
Section "ServerFlags"
Option "Xinerama" "0"
EndSection
Section "Monitor"
# HorizSync source: edid, VertRefresh source: edid
Identifier "Monitor0"
VendorName "Dell"
ModelName "1920x1200
Laptop Display Panel"
HorizSync 30.0 -
75.0
VertRefresh 60.0
Option "DPMS"
EndSection
Section "Monitor"
# HorizSync source: edid, VertRefresh source: edid
Identifier "Monitor1"
VendorName "Unknown"
ModelName "Default
Monitor"
HorizSync 25.0 -
100.0
VertRefresh 56.0 - 120.0
Option "DPMS"
EndSection
Section "Device"
Identifier "Videocard0"
Driver "nvidia"
VendorName "NVIDIA
Corporation"
BoardName "GeForce Go
7900 GS"
BusID "PCI:2:0:0"
Screen 0
EndSection
Section "Device"
Identifier "Videocard1"
Driver "nvidia"
VendorName "NVIDIA
Corporation"
BoardName "GeForce Go
7900 GS"
BusID "PCI:2:0:0"
Screen 1
EndSection
Section "Screen"
Identifier "Screen0"
Device "Videocard0"
Monitor
"Monitor0"
DefaultDepth 24
Option "metamodes"
"DFP: nvidia-auto-select +0+0"
SubSection "Display"
Depth 24
Modes "1920x1200" "1680x1050" "1600x1200"
"1600x1024" "1280x1024" "1024x768" "800x600" "640x480"
EndSubSection
EndSection
Section "Screen"
Identifier "Screen1"
Device "Videocard1"
Monitor
"Monitor1"
DefaultDepth 24
Option "metamodes"
"CRT: nvidia-auto-select +0+0"
SubSection "Display"
Depth 24
Modes "1600x1200" "1280x1024" "1024x768"
"800x600" "640x480"
EndSubSection
EndSection
|
This configuration permit you to use two simultaneus and independient
monitor (separete X screen), the laptop is a screen0 and the external
monitor is a screen1.
Audio
This machine have to Audio cards, Intel and nVidia, the last no work at
this moment, to activete the Intel Audio controller, verify the file
/etc/modprobe.conf have the next lines. by default, the index value es
"1", change to "0"
alias snd-card-0 snd-hda-intel
options snd-card-0 index=0
options snd-hda-intel index=0
remove snd-hda-intel { /usr/sbin/alsactl store 0 >/dev/null
2>&1 || : ; }; /sbin/modprobe -r --ignore-remove snd-hda-intel
|
Bluetooth notes
It's posible when you run the "
hcitool scan" yue get the
messages "
Inquery failed: Conection time out". You only need
reset the bluetooth device. I recommended put the next line in the "
/etc/rc.d/rc.local"
file. See also
this forum post.
Multimedia Keys
The multimedia keys have the next
keycodes.
Action
|
Keycode
|
Function Name
|
Volume mute
|
160
|
XF86AudioMute
|
Volume down
|
174
|
XF86AudioLowerVolume
|
Volume up
|
176
|
XF86AudioRaiseVolume
|
Play/pause
|
162
|
XF86AudioPlay
|
Previous track
|
144
|
XF86AudioPrev
|
Next track
|
153
|
XF86AudioNext
|
Stop
|
164
|
XF86AudioStop
|
|
Add the next lines in the
/etc/X11/Xmodmap file
! Multimedia keys.
keycode 160 = XF86AudioMute
keycode 174 = XF86AudioLowerVolume
keycode 176 = XF86AudioRaiseVolume
keycode 162 = XF86AudioPlay
keycode 144 = XF86AudioPrev
keycode 153 = XF86AudioNext
keycode 164 = XF86AudioStop
|
You could configure the multimedia keys using the
Keyboard Shortcuts
from Prefernce menu or run
gnome-keybinding-properties
whichever suits your fancy. Go to the Sound category in the Actions
column is expanded, then click on the desired action. The entry in the
Shortcut column will change to "
New accelerator...." Press the
desired key for the binding, and the shortcut is made.
Action
|
Shortcut
|
Volume mute
|
XF86AudioMute
|
|
Or add the next line in the
~/.gconf/apps/gnome_settings_daemon/keybindings/%gconf.xml
file
<?xml version="1.0"?>
<gconf>
<entry name="volume_up"
mtime="1190054305" type="string">
<stringvalue>XF86AudioRaiseVolume</stringvalue>
</entry>
<entry name="volume_down"
mtime="1190054303" type="string">
<stringvalue>XF86AudioLowerVolume</stringvalue>
</entry>
<entry name="volume_mute"
mtime="1190054292" type="string">
<stringvalue>XF86AudioMute</stringvalue>
</entry>
</gconf>
|
Updated BIOS
For update the flash BIOS under GNU/Linux Operating System, follow the
next steps.
- Download the latest BIOS version, i.e. A07MXG61.EXE (Dell
XPS M1710 download page)
- Verify or install the syslinux package (come with CentOS)
- Install the biosdisk
package (mirror)
- Create the floppy image from BIOS file, move the image file to /boot
directory and copy /usr/lib/syslinux/memdisk
file to /boot
directory
- biosdisk mkimage A07MXG61.EXE
- mv /tmp/A07MXG61.img /boot
- cp /usr/lib/syslinux/memdisk /boot
- Add the next line to /etc/grub.conf file
title BIOS Flash A07
kernel /boot/memdisk
initrd /boot/A07MXG61.img
|
- Reboot and select "BIOS Flash A07"
- Don't turn off the computer in this process
